Payments & Refunds
Processing Payments: How to process payments in AL-Desk.
- Locate a Voucher on the Client Information screen to collect payment on, or create a new Voucher
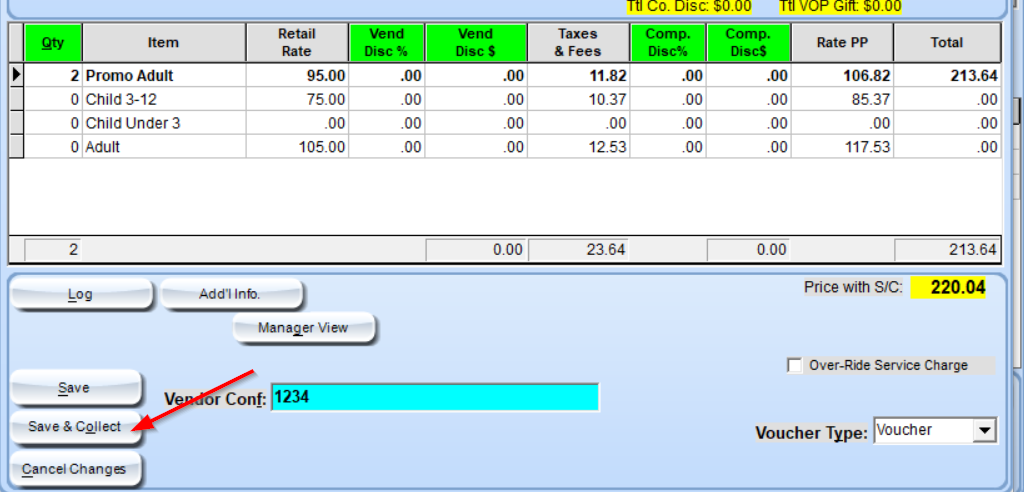
- If Creating a New Voucher, click ‘Save and Collect’ to enter the Payments screen
- If Loading an existing Voucher, click the ‘Payments’ button to enter Payments
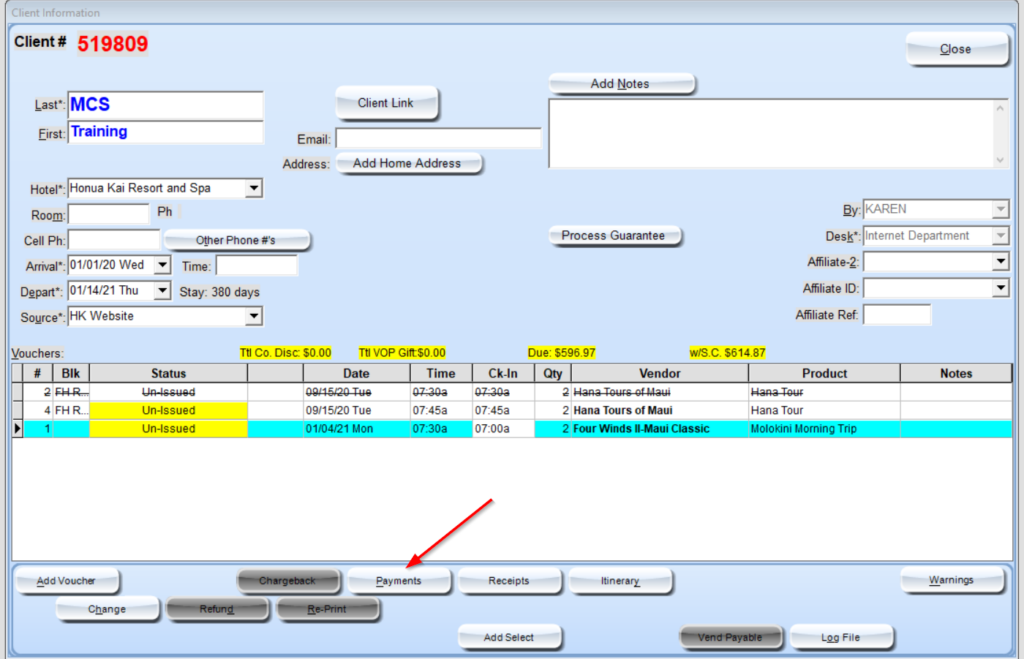
The Payments screen will load, opening with the “Payments” tab
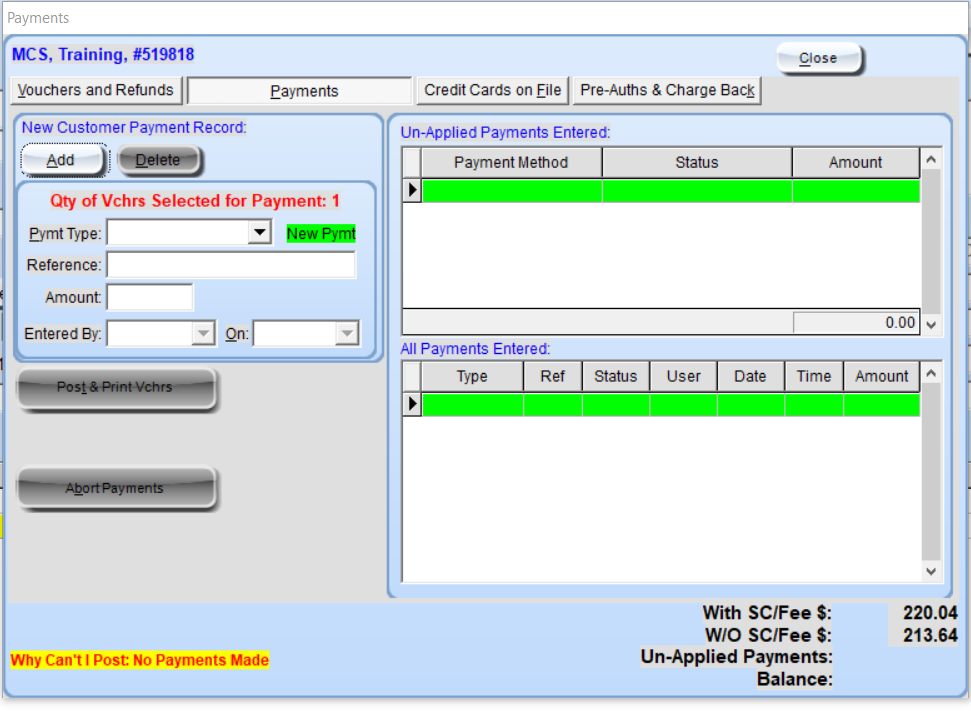
Click on the ‘Pymt Type”.
- If ‘Cash’ is chosen as the payment type, the user will be taken to the drawer/amount due screen where he/she can then process the payment.
- If ‘CC’ (credit card) is chosen the user will be taken to the credit card processing screen where he/she can then process the payment.
- The upper grid to the right shows the payment currently being applied. The lower grid shows all Payments which have been posted previously, with date and time information.
- The payment area will show the types of payments ALLOWED at that specific desk.
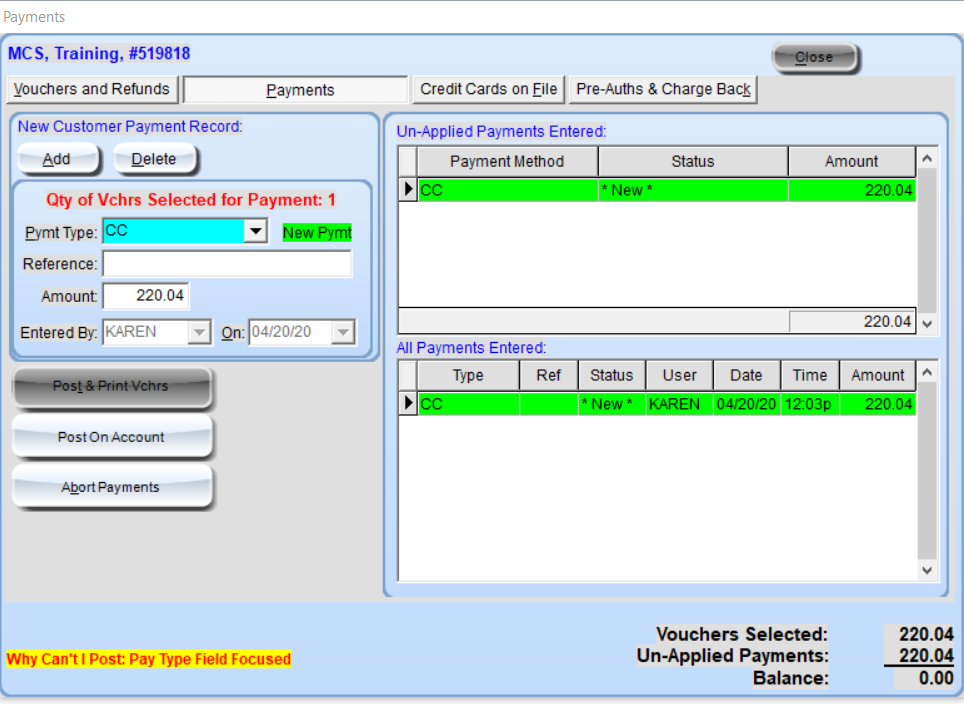
- The ‘Tab’ key may be used to access all of the necessary fields to be filled in the Payments Forms. Fill in all necessary fields.
- Finalize the process by single clicking the ‘Post & Print Vchrs’ button (Alt+T) located in the bottom left portion of the screen. The Voucher will then print to be given to the client.
- Abort the payment entirely by single-clicking the Abort Payments button (Alt+B).
- Once a payment has been processed, posted, and Voucher printed it will be considered issued and will appear on the Client Information with Issued status.
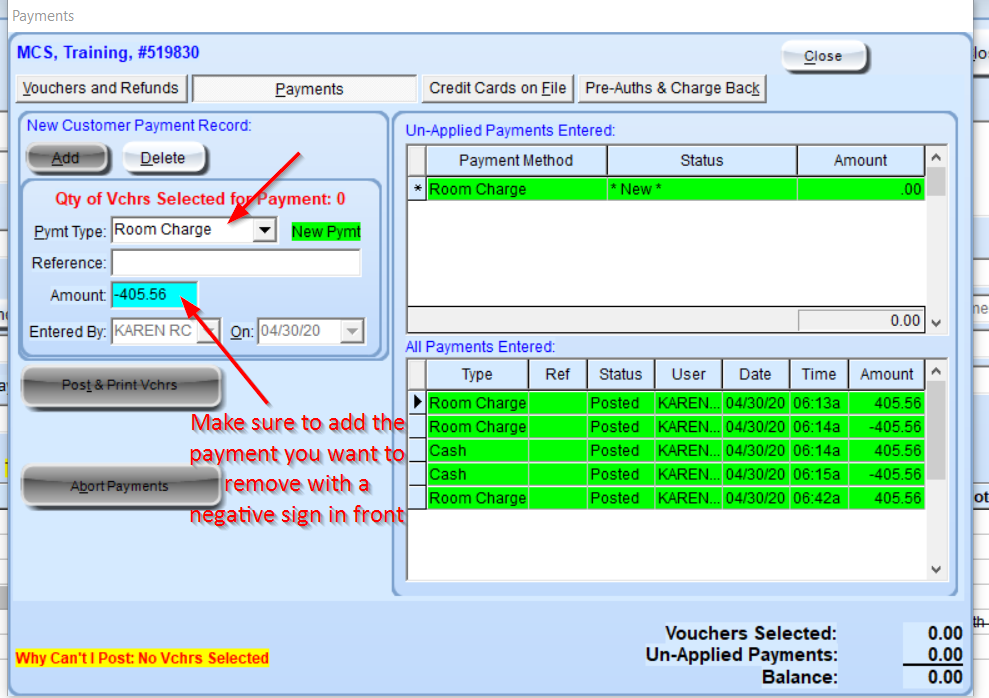
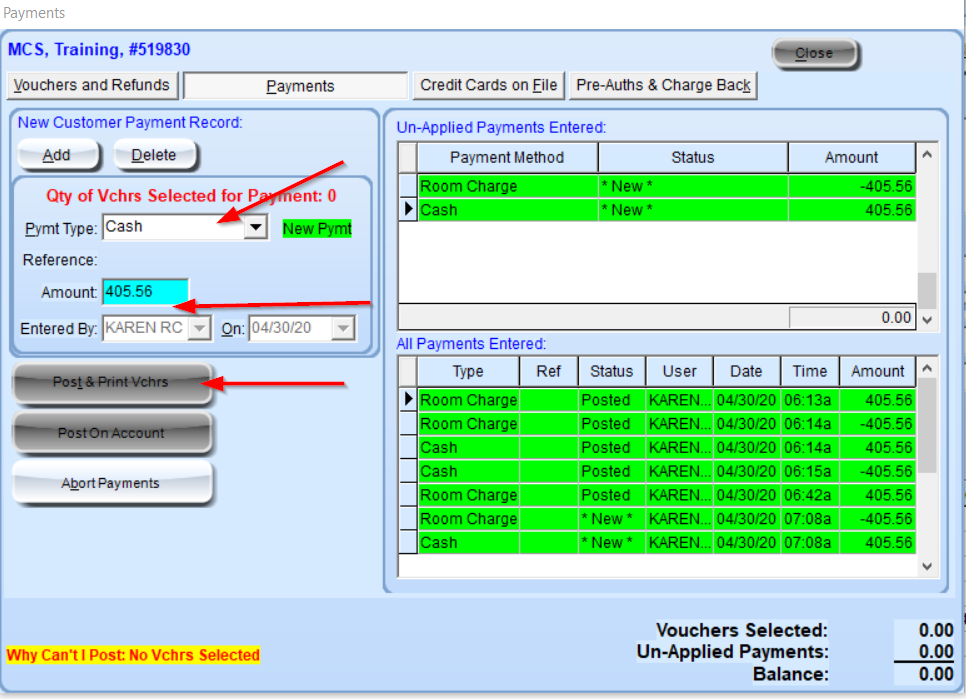
- If you process with the wrong payment type, you can just change the payment type, by entering the incorrect pay type as a negative and then choosing the correct as a positive. For example, you processed 200.00 as a room charge incorrectly, to change add a payment “room charge” and enter a negative 200.00 then hit tab and you will be directed to choose a pay type, then choose the correct one and tab through the process.
Paying only a few of the Vouchers
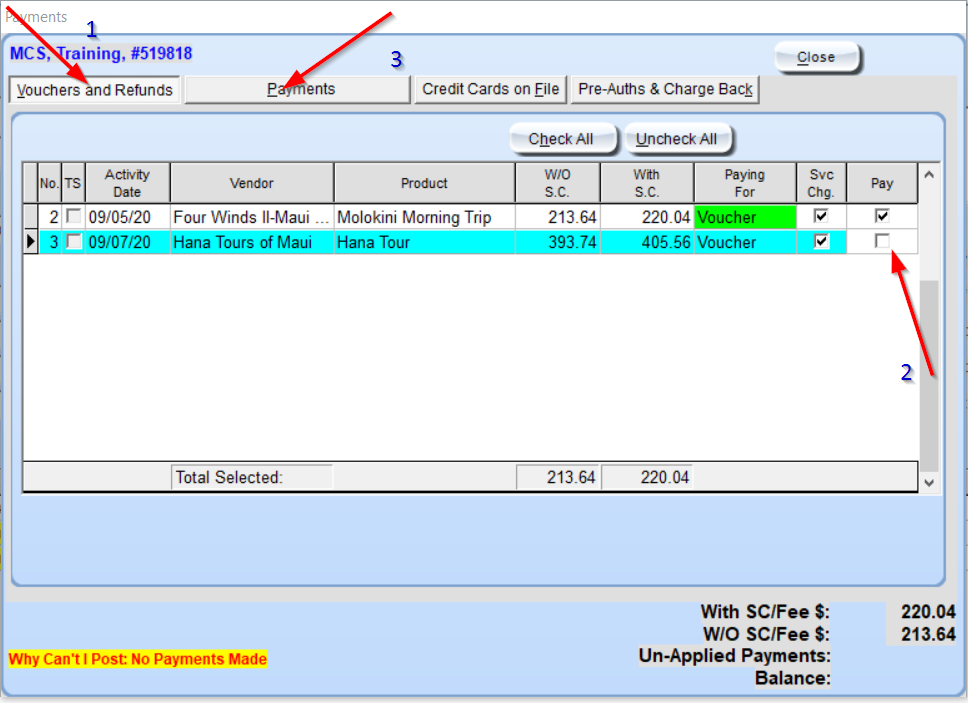
if you have a guest that has booked multiple vouchers but would only like to pay for one and pay for the remaining vouchers at a later date
- Click on the Payment button in the Client Information Screen
- Select the “vouchers and Refunds” tab
- Unclick the pay box
- Slide cursor over to “payment” tab.
VIDEO – PAYMENT AND PARTIAL PAYMENT
Process: Refunding Vouchers
- Only Vouchers that reflect an “Issued” status (payment tendered) may be refunded.
- Find the desired Client by Client# or by search inquiry from the AL-Desk opening query screen.
- If searching, highlight the desired Client from the results box and double-click or click ‘GoTo’ (Alt+G) to enter the Client Information screen
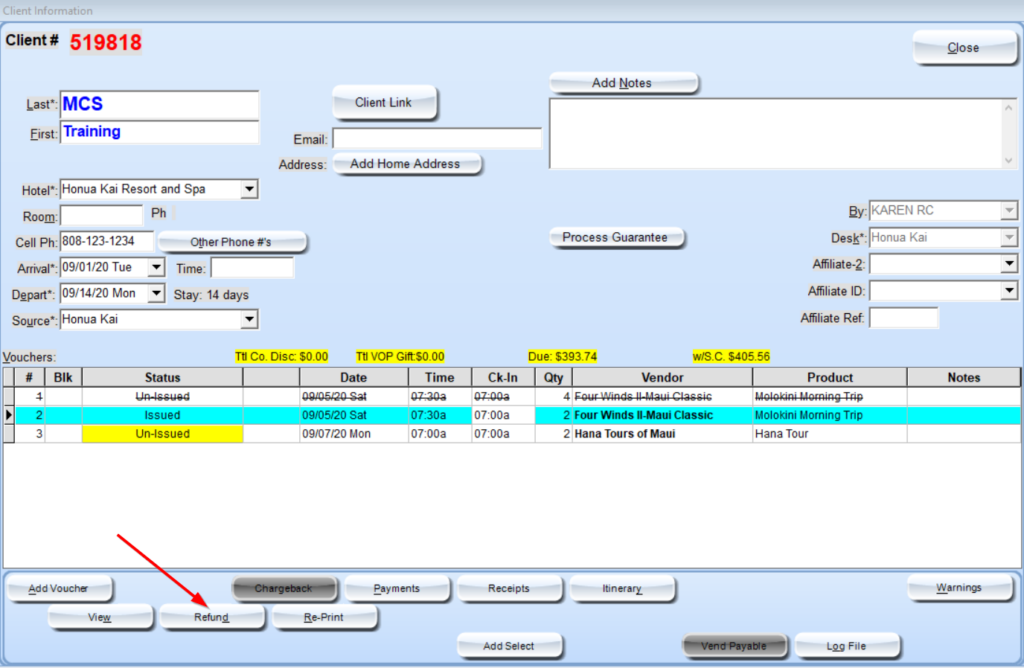
- Select the voucher you would like to refund by single clicking on it and click on the “Refund” button:
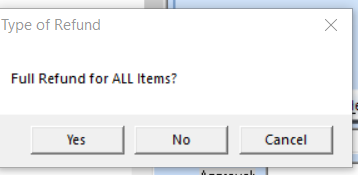
The Type of Refund box will appear:
Click ‘Yes’ (Y) to proceed with a full refund: Use this method if the Vendor has authorized the entire refund for an item purchased. For example, if you need to refund 1 or more people for a Voucher.
Click ‘No’ (N) to proceed with a partial refund: Use this method if the Vendor is only authorizing a partial refund. For example, if the Vendor authorized a $20.00 refund per person due to bad weather.
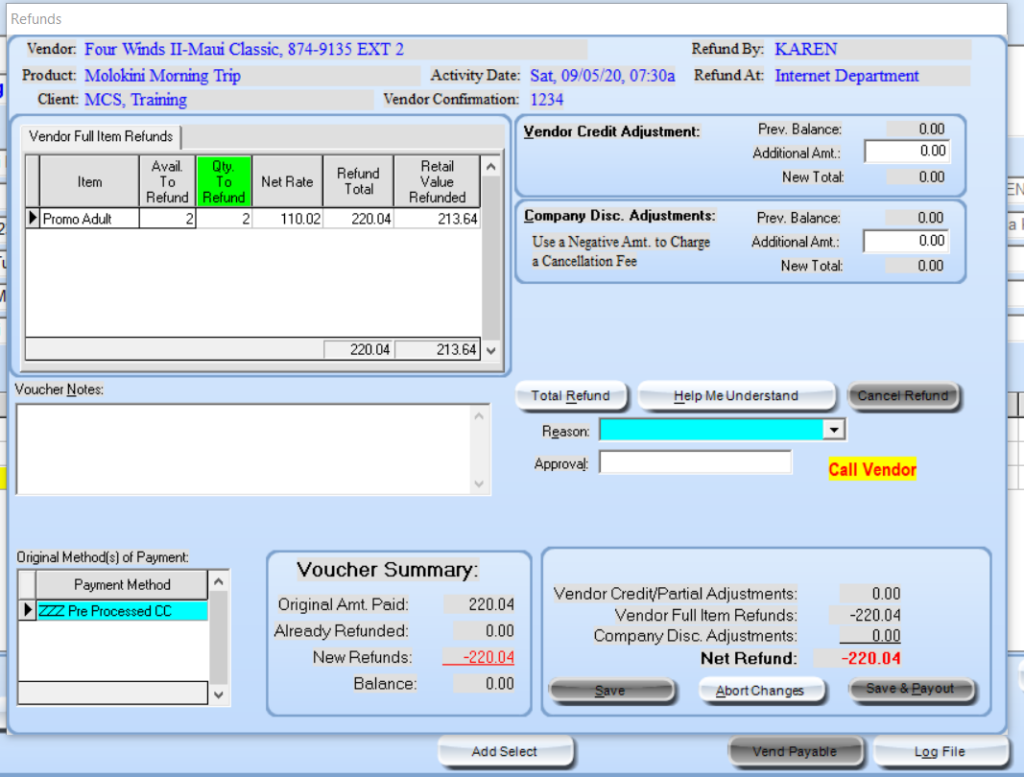
If a reason should arise that the refund shouldn’t be processed click the “abort Changes” (ALT +A) at any point
- Issuing FULL Refund:
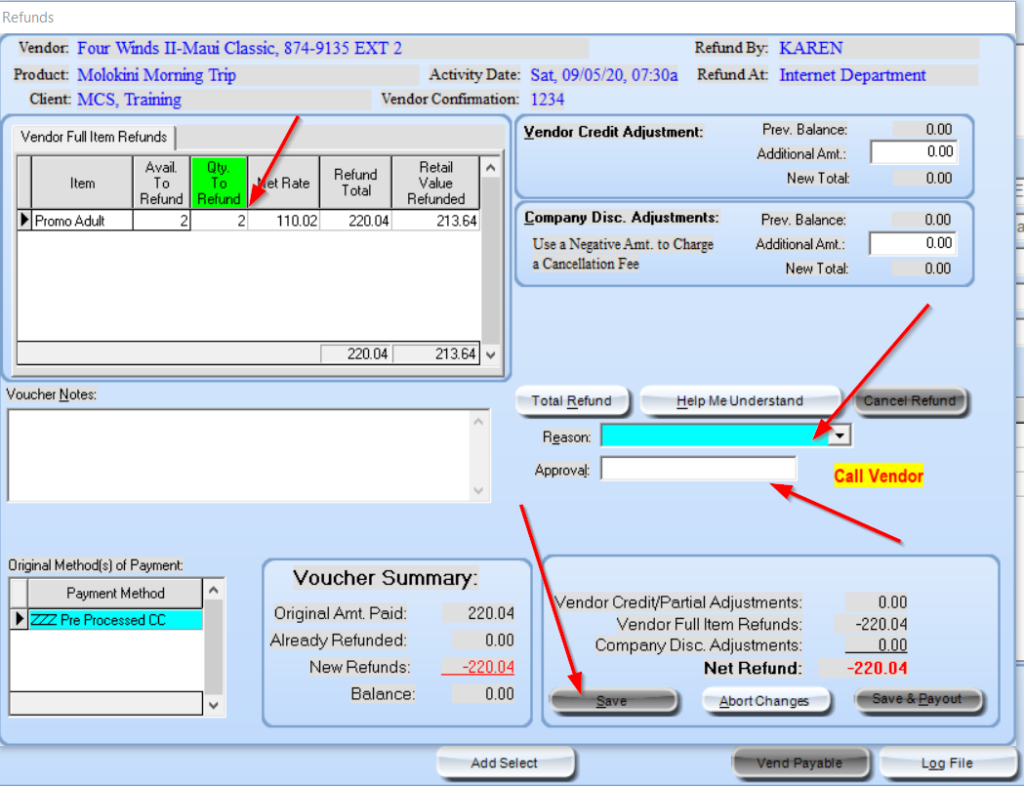
- Select a reason (Alt+E) for the refund (i.e. client cancelled, vendor – weather, etc.) in the drop down menu in the lower right hand portion of the screen.
- Obtain/enter a manager’s or vendor’s approval (Alt+L) in the drop down menu just below ‘Reason’
- Click ‘Save’ (Alt+S) to save without paying out or ‘Save & Payout’ (Alt+P) to save and payout
- If you have two people booked and only one person has decided to cancel you may change the number in the “Quantity to Refund” box prior to saving.
- If ‘Save’ (Alt+S) is selected:
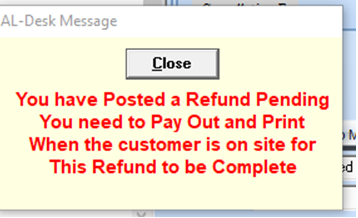
- A confirmation that the Refund has been processed will appear:
- The User will then need to complete the Refund at a later time.
- From the Client Information screen, select the “Ref/Chg Pending” voucher and highlight it. Click ‘Payments’ (Alt+P), to make the Payments screen appear.
- If ‘Save & Payout’ is selected the Payments screen will appear:The User will need to complete the payment immediately using the same form of payment that was used to purchase.
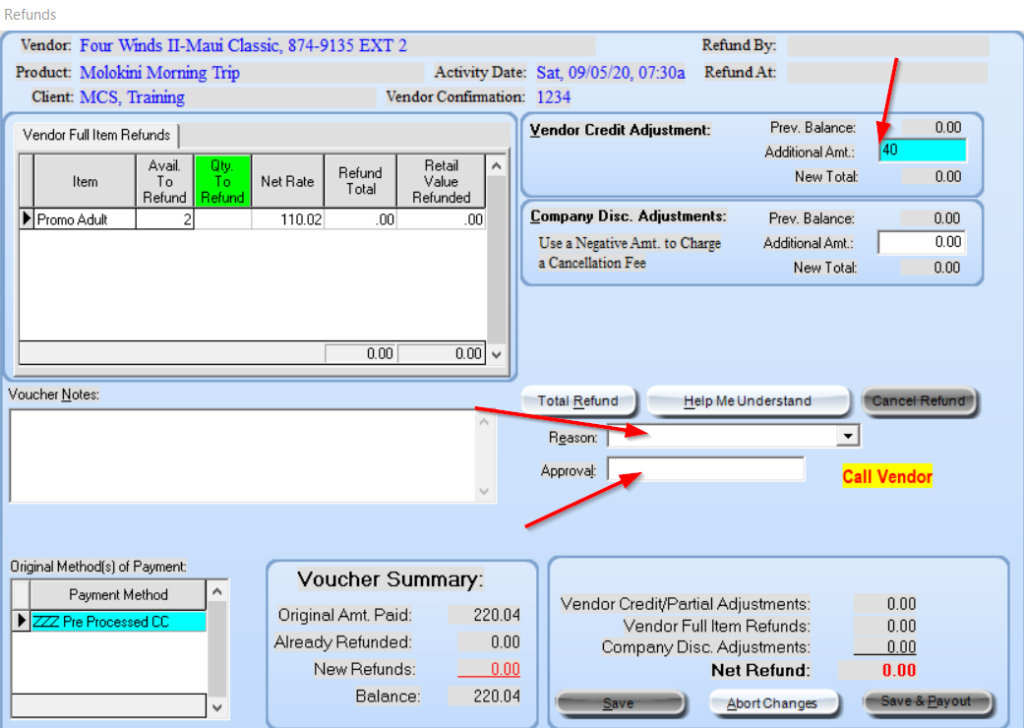
Issuing a PARTIAL Refund that is a different amount than a passenger amount (example: vendor authorized a $20 per person refund due to weather.
- Enter the partial refund amount in the Vendor Credit Adjustment (Alt+V) section in the upper right hand corner of the screen if approved by Vendor – Remember, if it is $20 per person vendor credit adjustment you will need to multiple that by the number of participants, in this case 2. Type in amount without a negative sign.
Select a reason (Alt+E) for the refund (i.e. vendor – weather, etc.) in the drop down menu in the lower right hand portion of the screen.
Obtain/enter a vendor or manager’s approval (Alt+L) in the drop down menu just below ‘Reason’
(1) Click ‘Save’ (Alt+S) to save without paying out or ‘Save & Payout’ (Alt+P) to save and payout.
If ‘Save’ (Alt+S) is selected:
A confirmation that the Refund has been processed will appear.
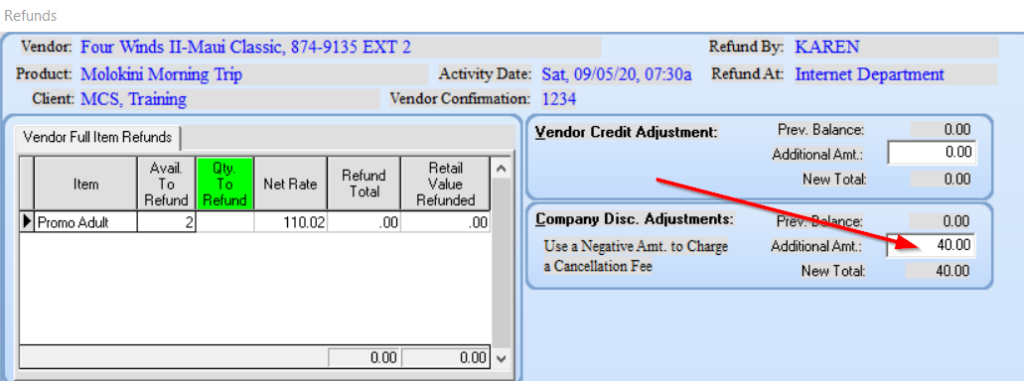
The User will then need to complete the Refund at a later time. If a partial company discount is being processed, type in the amount (without a negative sign) in the “Company Disc. Adjustments” area.
Canceling a Voucher
Find the desired Client by Client# or by search inquiry from the AL-Desk opening query screen.
- Only Un-Issued Vouchers may be cancelled. These are Vouchers on which Payment has not yet been collected.
If searching, highlight the desired Client from the results box and double-click or click ‘Go To’ (Alt+G) to enter the Client Information screen:
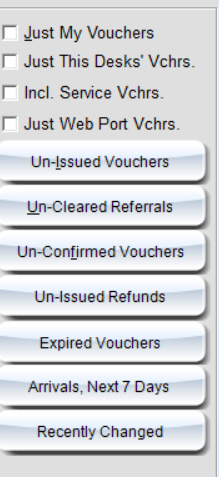
- Un-Issued Voucher information can also be found by clicking on the ‘Un-Issued Vouchers’ (Alt+I) from the AL-Desk opening screen
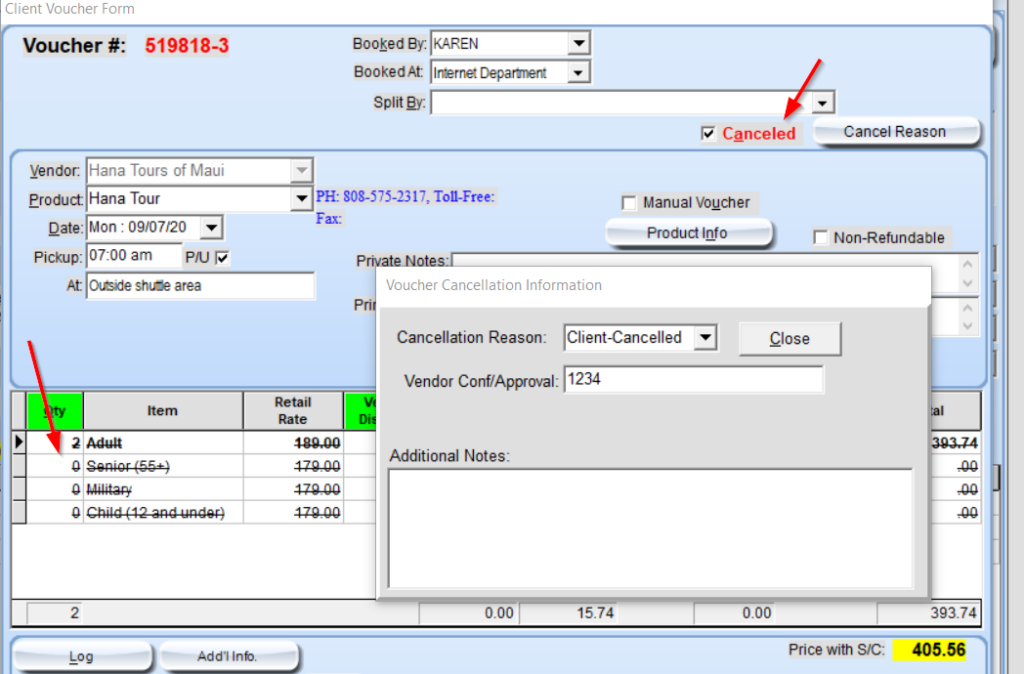
Click the Cancelled button
Enter the Cancellation reason and vendor confirmation
When a cancellation is complete, a line will be drawn through the record.
VIDEO – REFUND AND PARTIAL REFUND
Changing Payment Type
If a guest would like to change the payment type from, for example, Room Charge to Cash or Credit Card to Room Charge, there is no need to refund the original form of payment and create a new voucher.
Click the Payment Button on the Client Information Screen, the payment screen will then open
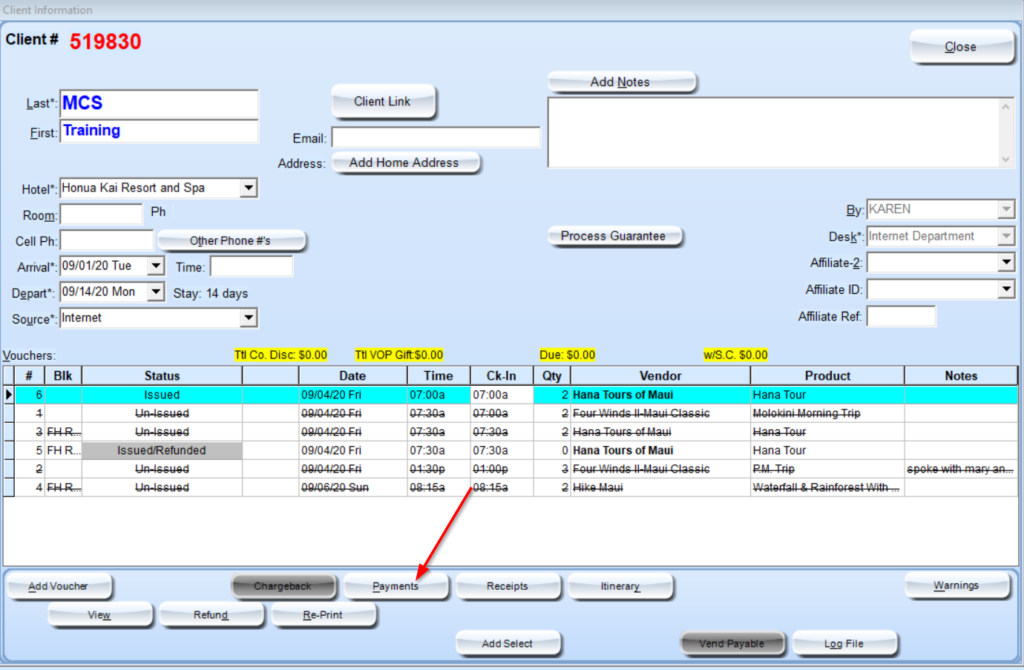
Click the Payment Button on the Client Information Screen
Click Add Payment and add the payment type you want to remove first, then add the dollar amount as a negative, hit the tab key and the payment screen will open again. You’ll then add the payment type you want to use, in this case cash, and the amount will automatically populate as a positive. Select Process Transaction.
